Frostpunk 2 lets you put most districts almost anywhere, which makes it easy to build a city that fights itself. A Food District in the wrong spot spreads Disease. Housing next to a mine fills with Squalor. A district on the far edge of the map needs more heat levels than the same district hugging the Generator. This guide goes through the placement rules that actually change your numbers, then puts them together into a layout you can copy.
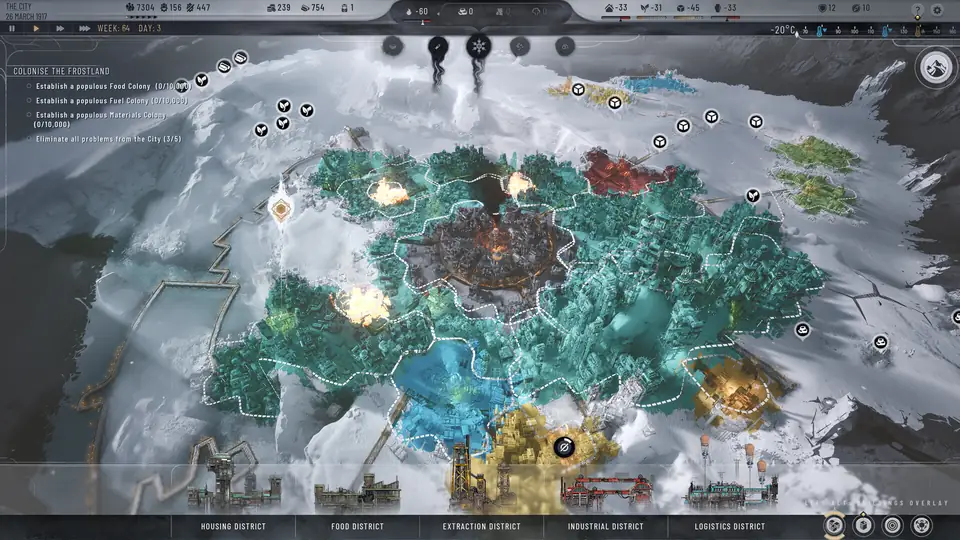
Where each district can go
Only two district types can go anywhere you have broken the ice:
 Housing can be built on any open space.
 Industrial can be built anywhere with no unlock needed.
 Food must start on a Fertile Soil deposit.
 Extraction must sit on a deposit: Coal, Materials, Oil, Steam, Prefabs or Cores. It runs until the deposit is used up and then shuts down.
 Logistics can only go on the Old Waystation ruins at the edge of the map.
So the map decides where Food, Extraction and Logistics go. Housing and Industrial are the flexible pieces, and your layout is mostly about where you put those two and what you keep apart.
The adjacency rules
These come straight from the district pages on the Game Vault wiki:
| If this district | touches | the city gets |
|---|---|---|
| Food | Industrial, Extraction or Logistics | more Disease |
| Housing | Industrial, Extraction or Logistics | more Squalor |
| Industrial | Housing / Food | Squalor / Disease |
| Extraction | Housing / Food | Squalor / Disease |
| Logistics | Housing / Food | Squalor / Disease |
Since patch 1.3 these proximity effects count per touching cell. Before that, two districts had to share 3 cells for an effect to apply, so a corner touch was harmless. Now a single shared cell counts. Old layout guides that say "a corner is fine" are out of date.
The rule of thumb is two zones. Clean side: Housing and Food together. Dirty side: Industrial, Extraction and Logistics together. Industrial and Extraction can touch each other freely, and the wiki notes a "Shared Workers" bonus between Industrial and Extraction districts that lowers Workforce use, so packing them tight actually helps.
The cost of getting this wrong is real. Disease puts workers on sick leave, so they drop out of your Workforce. Squalor raises Disease and Tension, slows population growth, and wears districts down until they break and need repairs.
Heat decides the shape
Since the heat overhaul, each district has its own temperature, and placement gives you free warmth in two ways:
 Generator warmth: +0.25 levels for each tile a district shares with the Central District.
 Warm neighbours: +0.25 levels for each tile shared with a district that is already Warm, up to +2.25.
Add insulation (+1, or +2 after the upgrade) and a well-placed district can reach Livable with little or no heat allocation. The heat planner does that sum per district.
That points to one shape: Housing and Food in the inner ring around the Generator, with long shared edges. They are the districts where cold hurts people directly, they are the ones you want to keep away from industry anyway, and they gain the most from Generator warmth. Make one Housing District Warm and let it heat its neighbours. Industry goes in the outer ring on the far side.
Worked example: a Housing District that shares 4 tiles with the Generator and 4 tiles with a Warm Housing neighbour gets 1 + 1 = 2 free levels. With basic insulation that is 3. Starting from Very Cold (1), it reaches Livable (4) with zero heat allocated. The same district placed alone at the edge would need 3 heat levels for the same result.
Hubs: one tile, area effects
Hubs are built like districts but take a single tile and affect the districts around them. The in-game descriptions say:
- Heating Hub: gives extra heat to neighbouring Housing, Food and Logistics districts. Put it inside the clean zone, touching as many Housing and Food districts as you can.
- Maintenance Hub: services neighbouring Extraction, Logistics and Industrial districts. It belongs in the dirty zone.
- Rail Hub: faster commutes and more productivity in neighbouring districts.
- Air Transport Hub: has a 2-tile radius. Any district with at least 3 tiles inside it gets −100 Workforce demand. Up to four districts can share one, and hub effects stack.
An Air Transport Hub surrounded by four Workforce-heavy districts saves 400 Workforce, which is most of a district's worth of workers. That is the hub to plan space for if you keep running short of Workforce.
A layout you can copy
- Inner ring: Housing and Food wrapped around the Generator. Give each as many Generator tiles as you can. Put a Heating Hub where three or four of them meet.
- Buffer: leave the side of the inner ring that faces industry as open ground or a hub tile, so nothing dirty touches it.
- Outer ring, far side: Industrial and Extraction packed together on their deposits, with a Maintenance Hub between them.
- Edge: Logistics on the Old Waystation ruins, wherever the map puts them. Keep Housing and Food away from that side.
- Workforce: an Air Transport Hub where four big production districts can each get 3 tiles into its radius.

Frostbreaking and fixing mistakes
You plan around the ice. A Frostbreaking order covers up to 8 connected tiles next to ground that is already broken, costs 4 Heatstamps and 25 Workforce per tile, and takes 2 weeks however many tiles you pick. Since patch 1.3 the cost counts per cell, so breaking only the tiles you need is cheaper than breaking a full block of 8.
Every new district needs 3 to 6 tiles, and expanding one adds 3 more. Leave room for the expansion when you place it, or you will pay to adjust later. Adjusting a district's area costs 50 Heatstamps and 50 Prefabs and moves any of its tiles except the very first one placed. That is also how you move an Extraction District onto a fresh deposit when its old one runs out.
Frequently asked questions
Can Food and Housing touch?
Yes. Neither causes a problem for the other, and both benefit from being near the Generator. Keep them together.
Does a corner touch still cause Disease or Squalor?
Since patch 1.3, yes. Proximity effects now apply per touching cell, where they used to need 3 shared cells.
Where should Industrial Districts go?
Away from Housing and Food, and next to your Extraction Districts. They can go anywhere, so put them where they touch other industry and nothing else.
What is the best hub?
It depends on your shortage. For heat, a Heating Hub among Housing and Food. For Workforce, an Air Transport Hub, worth −100 Workforce for each of up to four districts.
Can I move a district after building it?
You can adjust its area for 50 Heatstamps and 50 Prefabs. Every tile can move except the first one you placed.